Image by AbsolutVision on Unsplash
Enjoying the content? If you value the time, effort, and resources invested in creating it, please consider supporting me on Ko-fi.

The more that I use Azure cloud services, the more I think of ways to use them, either to do something new, or to replace some process or service I already use.
Today, I’ll show you how you can use Azure DNS to provide a Dynamic DNS capability at significantly reduced cost compared to services like No-IP and DynDNS. A future post will automate the process of keeping the DNS entry up-to-date.
Background
If you have any sort of IOT devices at home, or home network/server, you’ll likely have wanted to access those devices outside of your home network, and invariably not wanted to have to remember an IP address - especially as for home broadband, those aren’t static IPs. Granted, they may not change often, but when they do it’s a pain!
Pricing
For a number of years now I’ve used services from No-IP.com.
They offer a free service where you have to logon to their website once a month and verify you still need the hostname you’ve chosen, and they also provide updater clients for windows, linux etc which will ensure that their DNS records for the hostname you’ve chosen will always be up to date with your current home broadband IP address.
They also offer paid services starting at $24.99/year, where you get a wider choice of domain names, don’t need to verify the hostname every month and other features.
It occurred to me just the other day that I must be able to do this myself in Azure - and some quick googling led me to Azure DNS.
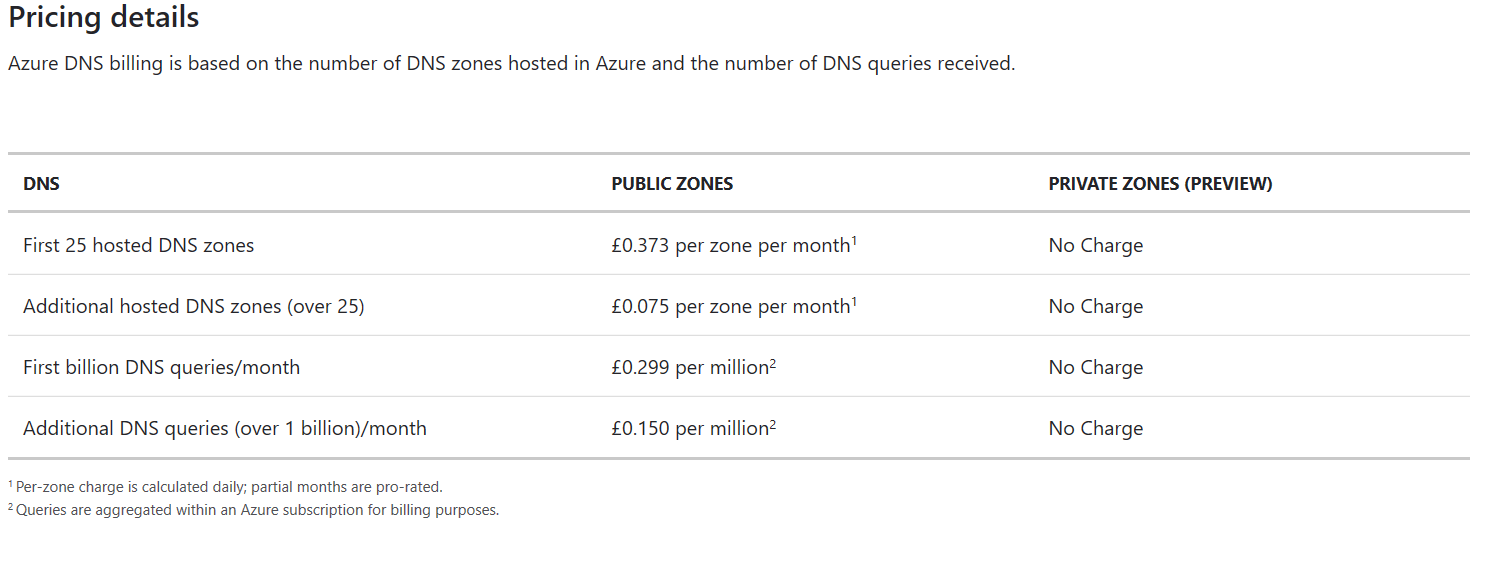
In terms of pricing, £0.37/month for hosting the DNS zone/domain, £0.29 per million DNS queries for the first billion in a month! So that takes us to £0.66/month or £7.92 per year (vs $24.99/year!)
If you have a domain name to spare, you can host it here in Azure and use Azure nameservers.
I considered using Cloudflare (as I already have two domains hosted there), I also considered not having to buy a domain and just use an Azure Function Proxy to redirect to your home-hosted services (e.g. web consoles etc) and I might even build and blog about those later but for today, let’s look at doing this using Azure DNS.
Building your own
Before we start, you’ll need a domain name that you don’t mind amending to use azure nameservers.
I bought one just for this exercise - I bought the cloudyg.xyz domain from namecheap.com for the princely sum of £0.98 for 1 year - so far still quids in compared to paid services at No-IP - £8.90 for the year!
Creating an Azure DNS zone
So, to begin with, we need to create a DNS zone in Azure to host the domain.
In a break from my posts to-date, today I’m going to show you how to do this from the Azure Cloud Shell instead of the portal itself.
You can either access this at shell.azure.com, by clicking on the cloud shell icon in the Azure Portal or using the new Windows Terminal.
Today, I’m going to do this through the new windows terminal.
Now, I could use AZ cli here, but I’m going to use PowerShell, because I will be using an Azure PowerShell Function later to automate the maintenance of the DNS records.
So, first of all, login to Azure using Login-AzAccount - if prompted, login via the browser as shown:
Create a resource group if you don’t have one ready to use for this:
New-AzResourceGroup -Name MyDyner -Location 'West Europe':
Now let’s create an Azure DNS zone for our domain, in the resource group we just created:
New-AzDnsZone -ZoneType Public -Name cloudyg.xyz -ResourceGroupName MyDyner:
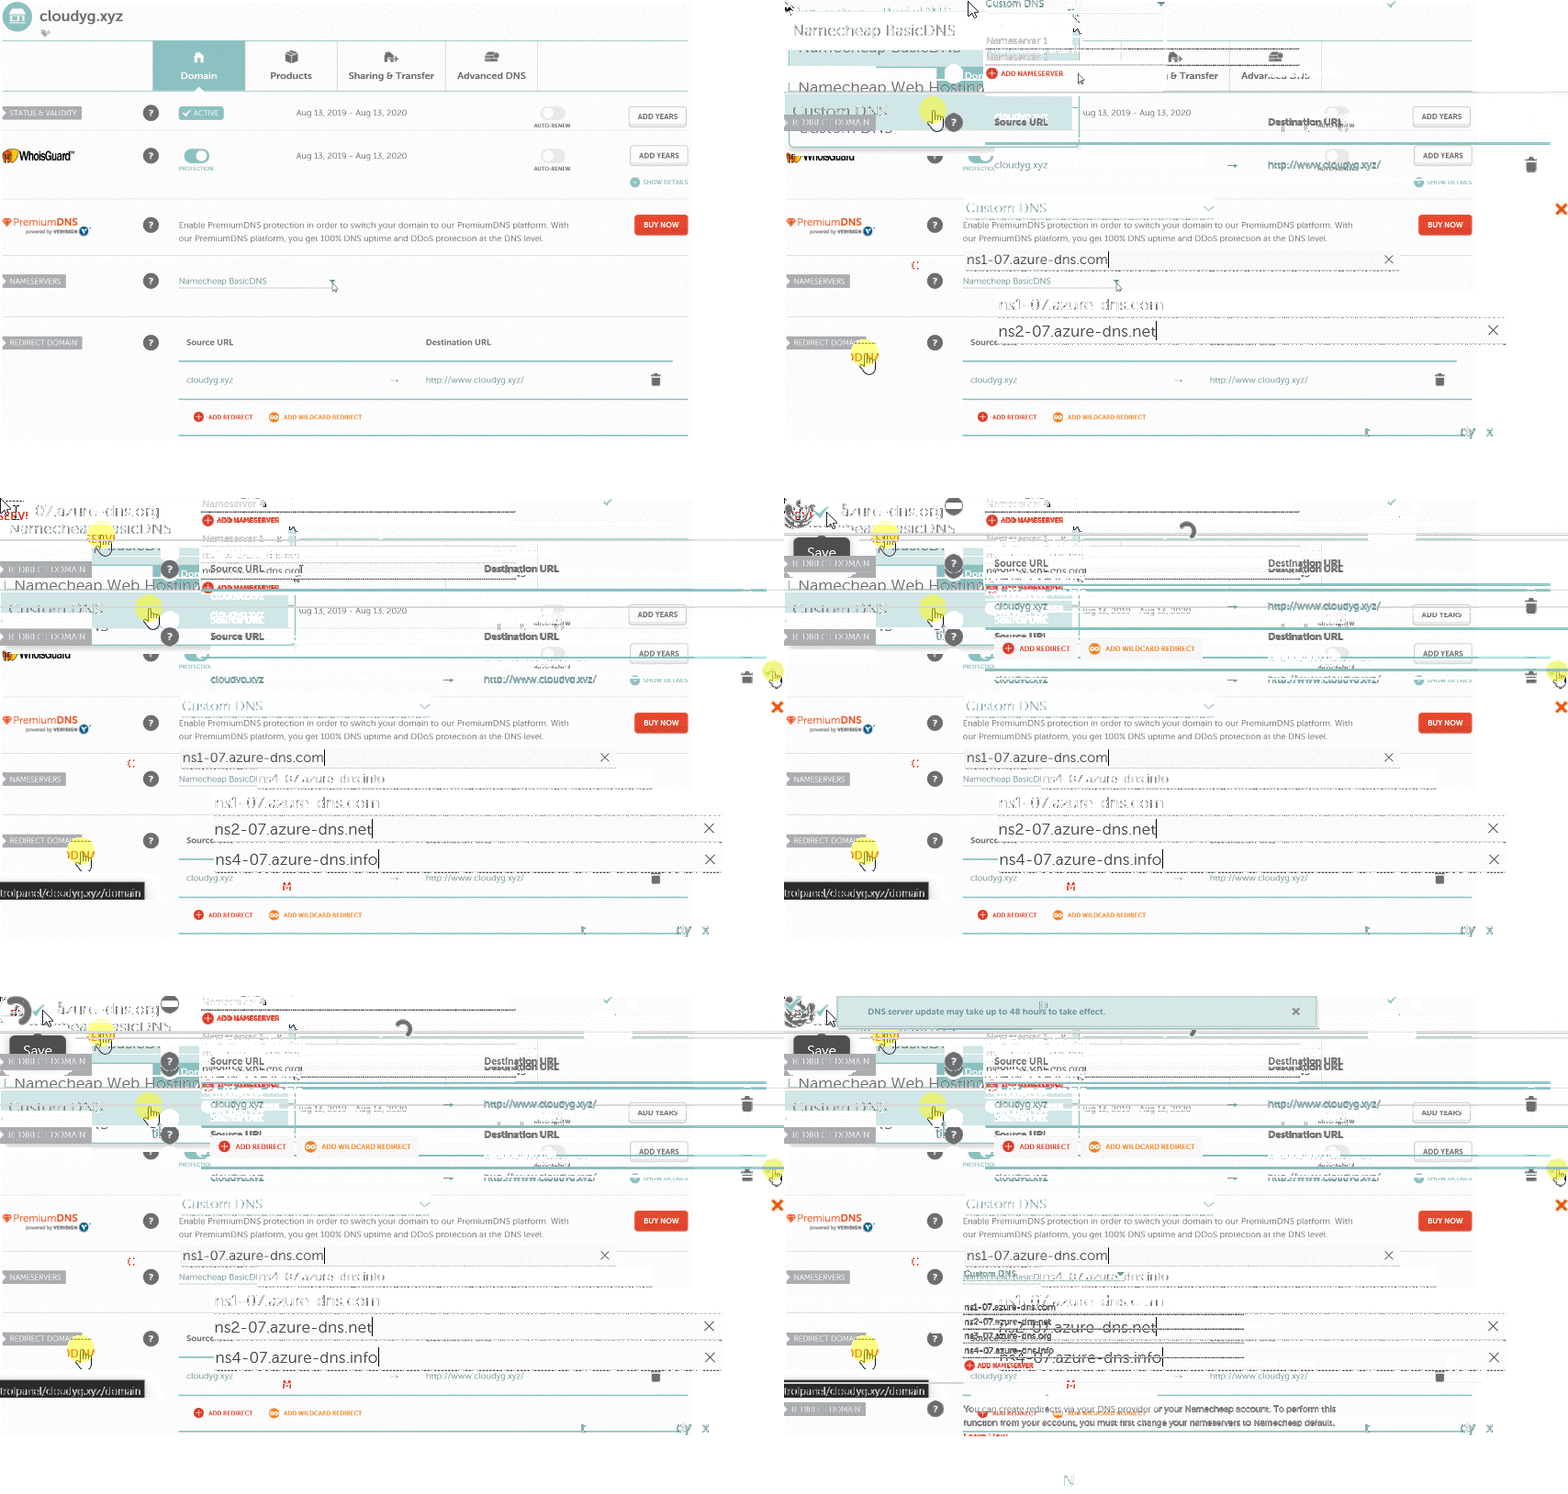
Now, login to the web management portal for your chosen domain name registrar and update the name servers to be at least the first two listed in the response - in my case I use namecheap, so below is how I’d do that on their website:
That could take up to 48 hours to propagate - in practice I’ve tended to see it take just 5-10 minutes at most - but it could of course take longer.
Adding an A record to the DNS zone
Now, we want to add a DNS A record, pointing to the IP of our home network.
There are a myriad of ways to do this - but rather than rely on the many websites that do this - we’re going to do a DNS lookup using OpenDNS - a simple nslookup myip.opendns.com resolver1.opendns.com from a windows machine, or from a linux machine with dnsutils installed - dig +short myip.opendns.com @resolver1.opendns.com will return your public IP address.
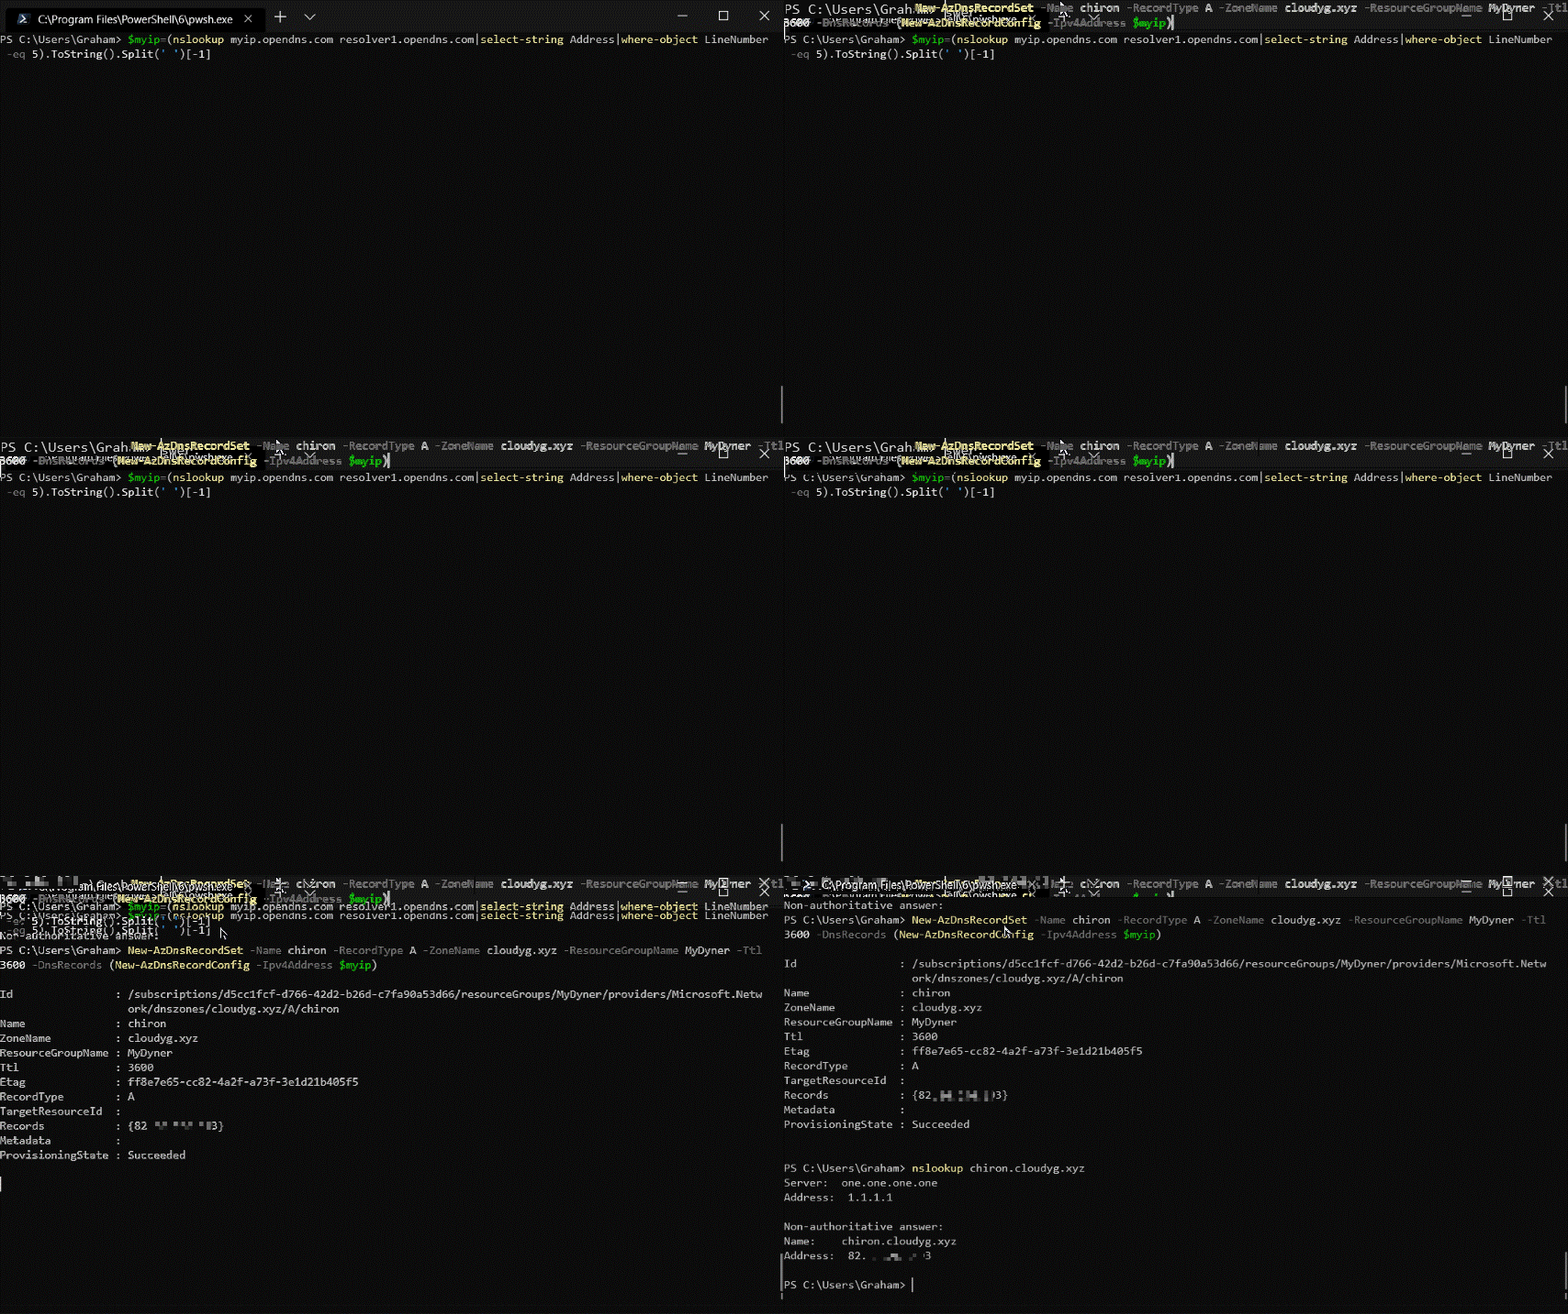
Now, to create the DNS record-set, we’ll use the following commands in PowerShell:
$myip=(nslookup myip.opendns.com resolver1.opendns.com|select-string Address|where-object LineNumber -eq 5).ToString().Split(' ')[-1]New-AzDnsRecordSet -Name chiron -RecordType A -ZoneName cloudyg.xyz -ResourceGroupName MyDyner -Ttl 3600 -DnsRecords (New-AzDnsRecordConfig -Ipv4Address $myip)
When you run them, you get a response as shown below, and nslookup confirms the DNS record is setup correctly:
In my next post, I’ll setup a process to keep that record up to date any time the public IP address changes.
I hope you have found this useful!
I’d also like to thank Simon Lee, owner/author of hypervlab.co.uk for recommending the ScreenToGif software I used to record animated GIFs for this post - hopefully you find it more useful than several screenshots and remember to check out his excellent blog!
As ever, thanks for reading and feel free to leave comments below.
